For each type of content you need for your site, you develop in three steps:
- Create the custom content type and configure its fields
- Set up your app to retrieve that content from the API
- Load the content into your page template
Let’s take a look at each of these steps in a little more detail as I walk through how to set up a simple news article website (demo website) with a homepage and article pages.
1) Article Pages
Create the Article custom content type
When developing a custom content type, you need to determine all the content fields you need. For example, a blog post might be a combination of text, images, and blockquotes. For a product, you would need to define the image fields, number fields, and text fields specific to your product page design.
For our article pages, we need to have a UID (unique id for SEO-friendly urls), publish date, title, main image, author, and three different repeatable sections that can be mixed and matched: text, quotes, and images.
The process for actually building the custom type varies from one CMS to another, but we’ll end up with a custom type that has all the fields we need to fill in with content. Here’s what our article custom type looks like:

The CMS I am using for this example is prismic.io, although any CMS that outputs JSON could be adapted for use here. For example, CSS-Tricks has a number of articles about the WordPress JSON API and it appears Perch Runway 3 will have “headless CMS” capabilities. Prismic also uses JSON to construct your custom types and configure your content fields. I have included the JSON code I used for my custom types for this project in the project package on GitHub. You can find them in the `customTypes` folder.
Once you’ve created and configured your article custom type, you will create a few articles, and next we’ll see how to query the API to retrieve them.
Set up the front-end app to query the API and load the articles
This is where an API-based CMS really shines. You can build your site however you want, using whatever technology you prefer. Many of the API-based CMSs out there provide specific development kits for the major technologies, which provide all the methods needed to query the API and parse the returned data. This makes it easy to bootstrap your project.
No matter what you code with, you will need to query the API to retrieve the content you want to display. I built this example site using prismic.io’s NodeJS development kit. I chose NodeJS because it is a simple and easy JavaScript server-side platform.
Let’s setup our app to load the pages via their UIDs. Here’s an example of the code we can use to query the API for our content pages.
app.route('/:uid').get(function(req, res) {
  var uid = req.params.uid;
  api(req, res).then(function(api) {
    // Here we are querying for a custom type ‘article’ by its unique ID
    return api.getByUID('article', uid);
  }).then(function(pageContent) {
    res.render('article', {
      pageContent: pageContent
    });
  });
});
Load the content into the page templates
Once we’ve collected the content we need from the API, then all that is left is to load the content in our templates. Our query to the API will return a JSON object which contains all of our content.
The development kits will also come with helper functions to make it easy and simple to load the content into our templates.
This example website uses the Pug (previously Jade) templating system to create the html for the pages. Integrating the page content is quick and easy. All we need to do is replace our static content with the content queried from the API.
Below I include the code to integrate the content into the template, but don’t include sections like, the header or the layout files. If you want to view these, feel free to check out the full project on GitHub.
extends ./layout.pug

block body
  include ./partials/header.pug

  div.article.container
    include ./partials/back.pug

    h1
      //- Here we insert the StructuredText field ‘title’ from the custom type ‘article’
      != pageContent.getStructuredText('article.title').asText() || 'Untitled'
    img.article-image(src=pageContent.getImage('article.image').url, class='star')

    - var sliceZone = pageContent.getSliceZone('article.body') || {}
    for slice in sliceZone.slices
      //- Render the right markup for a given slice type.
      case slice.sliceType

        // Text Section
        when 'text'
          div.article-section.text
            != slice.value.asHtml()

        // Quote Section
        when 'quote'
          div.article-section.quote
            span.block-quotation !{slice.value.asText()}

        // Image Section
        when 'image-with-caption'
          - var imageWithCaption = slice.value.toArray()[0]
          - var imageUrl = imageWithCaption.getImage('illustration') ? imageWithCaption.getImage('illustration').url : ''
          - var caption = imageWithCaption.get('caption')
          div.article-section.image
            img(src=imageUrl)
            if caption
              p
                span.image-label !{caption.asText()}

    include ./partials/back.pug
We are now successfully displaying the pages for our website! We will quickly go through this same process to set up our homepage.
2) Homepage & Layout
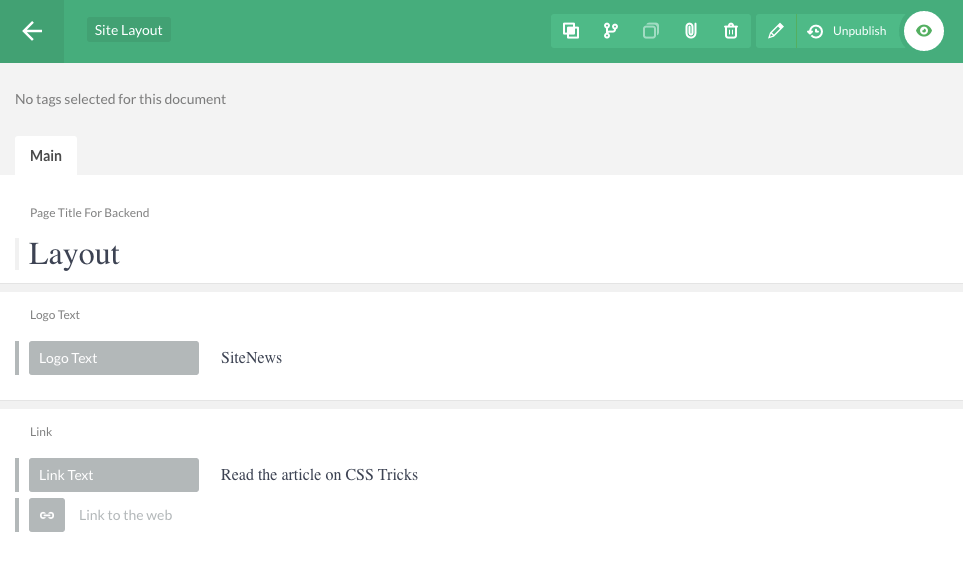
Create the layout custom content type
We will need a custom type for the layout of the site. This will include text for the logo, the link to this article, and the text for that link. The homepage itself will be composed of the content from all the articles, so we don’t need to create a custom type for it.
Query the API and load the homepage
To get all the content we need for the homepage, we will actually query the API twice. Once to get the layout content, then another time to display all of the articles in tiles on the homepage. Here is what this might look like using NodeJS:
// Route for homepage
app.route('/').get(function(req, res) {
  api(req, res).then(function(api) {
    // Query the site-layout content
    api.getSingle("site-layout").then(function(layout) {
      // Then query all the articles and sort by date
      api.query(
        prismic.Predicates.at("document.type", "article"),
        { orderings: '[my.article.date desc]' }
      ).then(function(articles) {
        res.render('homepage', {
          layout: layout,
          articles: articles.results
        });
      }).catch(function(err) {
        handleError(err, req, res);
      });
    }).catch(function(err) {
      handleError(err, req, res);
    });
  });
});
Load the content into the homepage template
Then it’s a simple matter of loading the layout and the article content into the homepage template. To add the layout content, just need to update the header.pug file.
header
  a(href="./")
    p.logo
      != layout.getText('site-layout.logo')
  a.article-link(href=layout.getLink('site-layout.link').url() target="_blank")
    != layout.getText('site-layout.link-text')
On the homepage, we will feature the most recent article at the top. So we take the first article and load it into this template:
div.featured-article-container
  div.featured-article(style="background-image: url(" + article.getImageView("article.image", "featured").url + ");")
    div.featured-content
      h2
        != article.getStructuredText('article.title').asText() || 'Untitled'

      //- display first valid slice text and limit it respecting the end of words.
      - var firstParagraph = article.getFirstParagraph()
      - var firstParagraphInPost = firstParagraph ? firstParagraph.text : ''
      - var textLimit = 100
      - var limitedText = firstParagraphInPost.substr(0, textLimit)
      p.description
        if firstParagraphInPost.length > textLimit
          = limitedText.substr(0, limitedText.lastIndexOf(' ')) + '...'
        else
          = firstParagraphInPost
      a.button.featured-button(href=ctx.linkResolver(article)) Read the article
Then all you need to do is integrate the rest of the articles.
div.article-tile
  div.article-tile-image(style="background-image: url(" + article.getImageView('article.image', 'tile').url + ");")
  img.article-tile-mobile-image(src=article.getImageView('article.image', 'tile-mobile').url)
  div.article-tile-content
    h2
      != article.getStructuredText('article.title').asText() || 'Untitled'
    p.meta-info
      != article.getText('article.author')
      span.date  -
        != ctx.dateConverter(article.getTimestamp('article.date'))
    //- display first valid slice text and limit it respecting the end of words.
    - var firstParagraph = article.getFirstParagraph()
    - var firstParagraphInPost = firstParagraph ? firstParagraph.text : ''
    - var textLimit = 300
    - var limitedText = firstParagraphInPost.substr(0, textLimit)
    p.description
      if firstParagraphInPost.length > textLimit
        = limitedText.substr(0, limitedText.lastIndexOf(' ')) + '...'
      else
        = firstParagraphInPost
    a.button(href=ctx.linkResolver(article)) Read the article
Once the integration is complete, we have our website pulling and displaying content from the API!
3) Other uses
Another benefit of using API-based CMS is that you can query and load content in other formats, like phone apps. To demonstrate this, I also created an iOS app that queries this same API and displays the news articles on your smartphone.
I built the app using React Native and followed the same process as above. I chose React Native because it allows you to create rich mobile UI using only JavaScript. While I only built an iOS app, React Native also makes it easy to also run your app on Android as well.
With the custom types already in place, you can start by querying the API. I provide some sample code below, but feel free to explore the entire project here in my GitHub repository. Here is the query to get the content for an article.
// The query for the article
async function article (uid) {
  try {
    const api = await PrismicHelper.getApi()
    const layoutDoc = await api.getSingle('site-layout')
    const articleDoc = await api.getByUID("article", uid)
    return {layoutDoc, articleDoc}
  } catch(error) {
    console.log(error);
    return {};
  }
}
Once you have queried the content, you can display it in your views using the same methods that we used above for our NodeJS website. Again, here is a sample of what it looks like.
<ScrollView>
<StatusBar
hidden
/>
<View style={styles.container}>
<Text style={styles.logo}>
{layoutDoc.getText('site-layout.logo')}
</Text>
<TouchableHighlight onPress={ () => this._navigate() } underlayColor='rgba(0,0,0,0)'>
<Text style={styles.back}>← back to list</Text>
</TouchableHighlight>
<Text style={styles.title}>
{article.getStructuredText('article.title').asText()}
</Text>
<Image source={{uri: article.getImage('article.image').url}} style={[styles.mainImage, styles.section]} resizeMode="cover"/>
{ !content ?
<Text>Content is missing, try again later</Text>
:
<View style={styles.contentWrapper}>
{content}
<TouchableHighlight onPress={ () => this._navigate() } underlayColor='rgba(0,0,0,0)'>
<Text style={styles.back}>← back to list</Text>
</TouchableHighlight>
</View>
}
</View>
</ScrollView>The benefit of creating a phone app separate from the website is that you can better connect with your audience and make it easier for them to have access to your content via their phones. You can even take it to the next level and send out push notifications every time you release a new article and truly keep your audience up-to-date. I found it very easy to integrate notifications using Urban Airship.
I hope that this article gives a good idea of what to expect with the API-based CMS approach. I love the freedom and the level of control that the API-based CMS provides. Starting with setting up your content types for exactly what you need. Then being able to use the technology and templating system that works best for you and your project. And finally connecting to the API to easily integrate your content into your templates.

I love the article, but IMHO, it’s missing one huge point: the website should be built the same exact way as the mobile app, by querying the CMS directly, not by having a server act as a proxy that queries the CMS.
Whether it be Node.js or anything else, involving a server environment breaks the out-of-the-box scalability and flexibility that you get from querying the CMS directly. I recommend hosting the static front end (HTML, CSS, and JS) in the cloud somewhere (say, S3 for storage with CloudFront for delivery), giving you completely automatic, maintenance-free scalability. Let the CDN worry about delivering the front end, and let the CMS worry about delivering the back end.
(The next question, of course, is what do we do with search engines and other crawlers? Well, we either involve an isomorphic JS environment to mimic the front end on a server just for crawlers, or we crawl our site ourselves and serve the content to crawlers statically as well. Anyways, this is a whole article of its own.)
Unrelated to my previous comment – if you do use NodeJS, and you’re not using ES2017 like the React example, you can still avoid all that nesting and repetition by chaining the promises:
I really like that approach. I like to take it further and build a completely static front-end, where I fetch the data from the CMS at build time in development, and store it in a JSON / YAML file, and then use that data to render the Pug templates.
This way, there is literally no
lagto get the data when the page is requested – the content is already compiled to HTML and served immediately.Prismic.io / Contentful are awesome for this – but you can even consider using services like Airtable or the excellent, still-in-alpha Dato CMS, that offers scripts to render the content into static data files.
Of course, everytime the content changes on the CMS, you need to re-compile the site – but hosting CDN services like Netlify or Now allow to automate this process via solutions like webhooks / Zapier.
Building 100% pre-compiled sites that run on any CDN, yet have a non-tech-client-friendly admin area, is a wonderful feeling! Spread the JAM :)
Hi, do you think it is possible to use this approach with AngularJS? One would have to somehow maybe print it to the template via PHP so it happens on the server and not the client?
The only downside I could see to an API based CMS is if the developer hosts the CMS off site and just sololy uses JS to AJAX the data to his page then if one goes down you host no content so you would need a pretty good failsafe like caching it on the client server.
True, but the same exact thing applies if you don’t have an API-based CMS and it goes down ;) You have to plan for scalability and availability in either scenario, except the headless CMS scenario is a lot easier to scale.
I’ve build a site using Prismic and react recently, was a joy to work with both technologies and it only took a few minutes to explain the CMS side of things to the clients.
One thing that scares me though is if Prismic (or the service you’re using) goes out of business.
Good for SPA or RIA, but a bad approach for “normal” site. It hurts the performance and the user.
https://adactio.com/journal/11512
Besides the difficulties for bots and SEO
Thanx for the article…though i lost it when i tried to read those Pug template.
I have used Prismic and can say only positive things about the product and the team behind it. Easy to use, beautiful UI, quick responses from their support and most importantly, you can render the JSON whenever you can, even crazy stuff like 3d with webGL and so on..